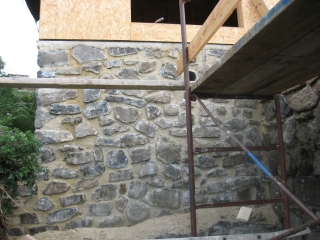
All the wood used in the house has been sprayed with a solution of sodium borate and water at a ratio of 120 grams of sodium borate per liter of water. When I visited last September, most of my time was spent in spraying all the posts and beams used in the first floor of the house. Now, we are doing the same treatment for all the wood used in the roof structure. Sodium borates are naturrally occuring salts that result from the combination of two elements: oxygen and boron. The are found as mineral deposits around the world. They are considered benign for human health and have proven to be effective in preventing attacks from wood-pests and fungi.
The carpenters are laying down the ceiling planks on top of the roof structure (trusses and joists). This is the actual ceiling that will be visible from the inside of the house. The planks are from local pine wood. Directly on top of the ceiling goes a vapour barrier. The next step will be to place another layer of beams perpendicularly to the main trusses. These beams are taller than larger and will form the sides of the compartments inside which the 25cm of cellulose insulation will be blown. OSB boards are then used to close the insulation compartments.
After several trials on a small part of the stone wall at the back of the house, to determine the type of sand, colouring and brushing technique, we were ready to start grouting the rest of the house. As for the rest of the house, and in order to maintain the breathability of the walls, we used lime to mix with the sand rather than regular cement.
Grouting is a rather long and tedious work but it is the last touch on a stone wall and depending on the materials and techniques used, the result can be drastically different. We tested two different types of sand because of their colour and caliber (one finer than the other); both are locally sourced. We decided to add a little bit of natural colouring to make the grout a tad yellow so it would match some of the moss hues one can find on some of the stones. The sand caliber is important as if it’s too fine, it may not adhere to the stone as well in the long term; small fracture lines may appear where the grouts meet the stones and moisture or water may start infiltrate.
The masons started with the stone wall that covers the rainwater cistern at the back of the house. This wall is not seen very much from the road and therefore they could practice and fine tune the technique before moving to other more visible walls.
The grouting mix is pushed with a trowel in all the cracks around the stones. It is then left to dry for a few hours before brushing starts. Depending on the type of brushing (hard, soft, circular, etc), the appearance of the grout will vary. The brushing enables to reveal the outline of each stone, push the grout mix in all the small little holes for better bonding and give a certain look to the grout itself. Some stone walls have very thick grouts where the stones are half covered by the grouts. We chose to have our grouting done so that the stones would clearly stand out.
The picture gallery below shows more pictures of the grouting. The first main wall to be done was the South East facade and while the grouts are not completely dry yet, the end-result is already amazing.
While waiting for the stone masonry to be complete at the roof line, the carpenters started to assemble the garage wooden frame.
The frame was delivered in pre-fabricated panels or walls that they positioned on the garage footing. Building the garage is such a contrast compare to the labour-intensive construction of the house. Of course, the garage will not be as cozy and insulated as the house but it does not need to be. Although the wooden frame looks light, it has been measured and built to support a fairly sturdy roof structure as we will be putting the same heavy slates on the garage as on the house.
There will be one big window in the garage, facing the mountains. This is where we plan to install a small workbench and shelves for small DIY projects…


